/
Activate each linked user by entering the credentials
Activate each linked user by entering the credentials
- Thomas Speekenbrink
- Remco Visser
- Thomas Speekenbrink (Unlicensed)
- Jan Verlaan (Unlicensed)
Owned by Thomas Speekenbrink
Overview
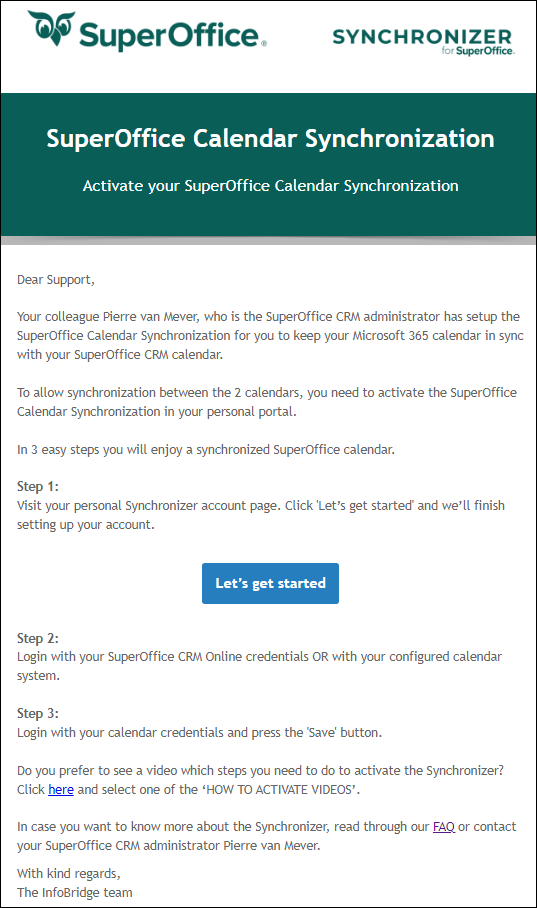
After the Synchronizer admin has added the users in the profile, each user will receive an email with instructions on how to authorize.
How to
In 3 easy steps, you will enjoy a synchronized SuperOffice calendar.
Step 1:
Click the Let’s get started button in the email.
Step 2:
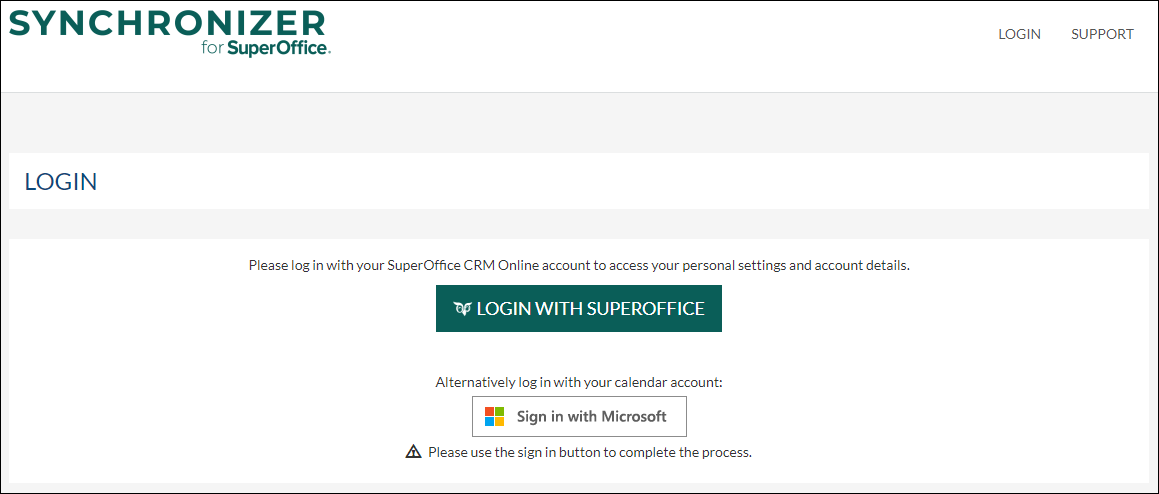
Log in with your SuperOffice CRM credentials.
Note: In the above example, the profile is connected to Microsoft 365. Alternatively, you can also use the Sign in with Microsoft button to authenticate.
Step 3:
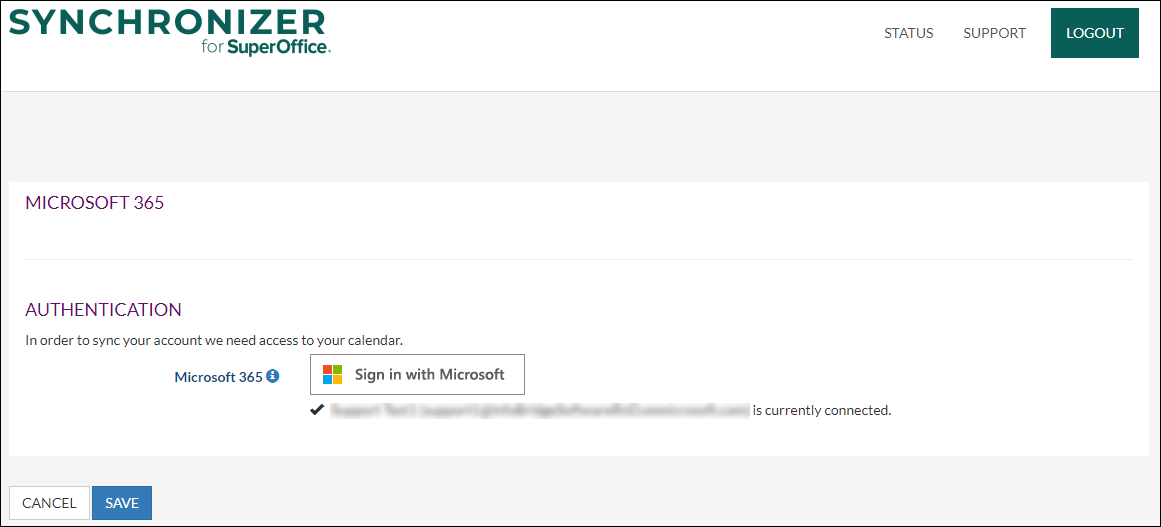
Log in with your calendar credentials.
Start Synchronizing
As soon as the connections to SuperOffice CRM and the calendar system have been established the Synchronizer will start working for the user.
Example email the users will receive once they are linked in the profile
, multiple selections available,
Related content
Link Users
Link Users
Read with this
Create a synchronization profile (SuperOffice Onsite)
Create a synchronization profile (SuperOffice Onsite)
More like this
(Re)activate synchronization for Microsoft 365
(Re)activate synchronization for Microsoft 365
Read with this
How to add users to Synchronizer
How to add users to Synchronizer
More like this
Start Synchronizing
Start Synchronizing
Read with this
Sign up for a new account
Sign up for a new account
More like this