Changing my personal preferences for synchronization
Overview
Each linked user in the Synchronizer can change the Synchronizer preferences to their liking.
Note: When the Edit preferences option is not available in the customer portal of the user, the admin user has turned off this option. Please turn to your Synchronizer admin user.
How to:
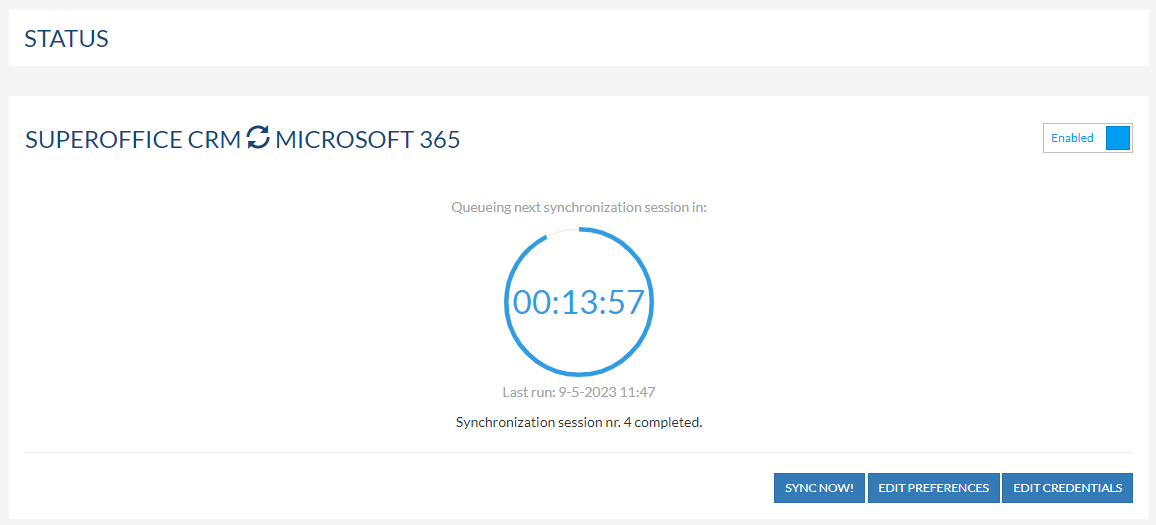
Log in to the customer portal by going to Synchronizer
Click the Sign in With SuperOffice button and fill in your SuperOffice credentials to log in.

In the customer portal overview click on Edit preferences to go to your preferences and make changes where needed.
User preferences for SuperOffice CRM
Fields
Job title field / Default: Use default SuperOffice job title field
- Determines which SuperOffice field is being used to sync to the Job title field in Exchange / Outlook or Google. Self-created fields in SuperOffice will be selectable here
Title field / Default: Use default SuperOffice Mr/Mrs filed
- Determines which SuperOffice field is being used to sync to the Mr/Mrs field in Exchange / Outlook or Google. Self-created fields in SuperOffice will be selectable here
Department field / Default: Use company department field
- Determines which SuperOffice field is being used to sync to the Department field in Exchange / Outlook or Google. Self-created fields in SuperOffice will be selectable here
Subject
Subject / Default: Type * First line of description * Company * Department * Person
- Set the subject buildup of your choice (how is it displayed in the Exchange / Outlook or Google subject field), please note the possible length for some of the combinations
Language
- The preferred language in case there are multi-language list items used in the Subject field
Person Synchronization
Static selection(s) / Default: empty
- Configuring a static selection(s) will make sure that the contacts are added to your external email system. How to Synchronize Contacts from a SuperOffice Selection is described here.
Note: when adding large selections (with more than a few hundred contacts), it will impact the performance of the Synchronizer and adding contacts for the first time can take a long time.
Appointment and Task types
Synchronize types / Default: empty
- Specify the appointment and task types that you want to synchronize. If you select nothing, all appointments and tasks are synchronized.
Note: Adding or removing a type does not affect already synchronized items.
Other
Synchronizer SuperOffice reminders / Default: Yes
- This option determines if the SuperOffice reminder (also known as Alarm) must also be synchronized to the external system
Use personal phone numbers as primary / Default: Yes
- This option uses the personal phone number as a primary phone number instead of the company phone number
Synchronizer contact birthdays / Default: Yes
- This option will sync the birthday field for the Exchange / Outlook or Google Contact person (if they are filled in on their Contact card)
Add participant details in text / Default: Yes
- This option adds the participants to the appointment or task description field in the external system
Link person by e-mail in text / Default: No
Incoming
Appointment / Default: -Use default appointment type-
- When an appointment is being synced from your calendar system, it will be created with the selected Appointment Type chosen here. The "Follow-up - Type" list in the SuperOffice Settings and Maintenance holds these options
Task: Outlook Task / Default: -Use default task type-
- When a Task is being synced from your calendar system, it will be created with the selected Task Type chosen here. The "Follow-up - Type" list in the SuperOffice Settings and Maintenance holds these options
Use incoming category as SuperOffice category / Default: No
- This option tries to set the incoming Appointment or Task type to the category in your calendar system. How to use the incoming category as a Superoffice category is described here
Outgoing
Appointment / Default: SuperOffice Appointment
- This option categorizes the outgoing SuperOffice Appointment to your calendar system for easy identification.
Task / Default: SuperOffice Task
- This option categorizes the outgoing SuperOffice Task to your calendar system for easy identification.
Person / Default: SuperOffice Person
- This option categorizes the outgoing SuperOffice Person to your calendar system for easy identification.
User Preferences calendar system (Exchange, Google (Gmail / Google Workspace) or Microsoft 365).
Authentication
In this part, you can manage the connection towards your calendar system
- Exchange: Fill in your username for your calendar system here. In some cases (like with hosted Exchange) this can be your email address.
- Microsoft 365: Click the connect button
- Google: Click the connect button
Synchronization settings
Synchronize all-day events / Default: Yes
- Select this option if you would like to synchronize all-day events to your CRM system
Synchronize appointments marked free / Default: Yes
- Select this option if you would like to synchronize appointments, marked as free in your calendar system, to your CRM system
Synchronize Outlook reminders / Default: Yes
- Select this option if you would like Outlook reminders to be synchronized to your CRM system
Synchronize private appointments / Default: No
- Select this option if you would like to synchronize private appointments with your CRM system. Please note, if you would like the private appointments to stay private, please follow this Knowledge Base article before enabling this option
Add participant details in text / Default: No
- Select this option if you would like to synchronize participant details to the appointment text in your CRM system
Note: Selecting one of these options does not affect already synchronized items.
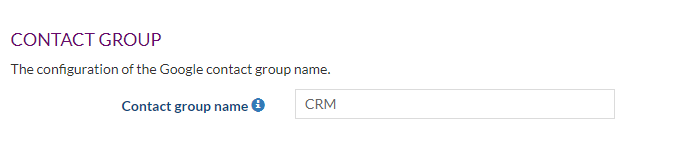
Contact Group (For Gmail / Google Workspace users only)
All contacts synchronized to Google are placed in a separate contact group. Here you can specify the name of this group
Time Zones
Please verify that the time zones are set correctly. Incorrect time zone settings could result in an erroneous appointment and task times.

Advanced Settings (Optional)
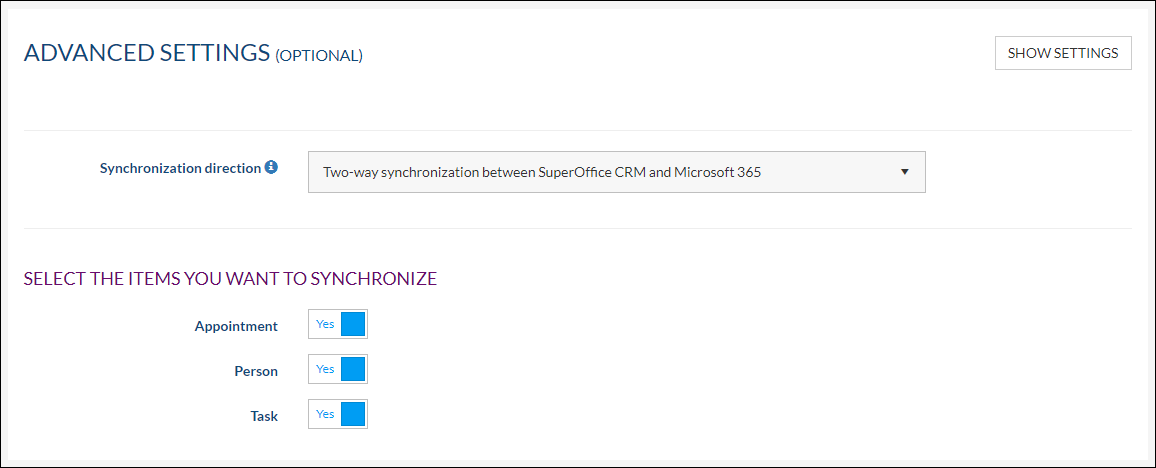
Synchronization direction
- Defaults to Two-way synchronization between SuperOffice CRM and Microsoft 365, but you can change to One-way synchronization or No synchronization at all.
Select The Items You Want To Synchronize
Appointment / Default: Yes
- Select this option if you would like to synchronize appointments
Person
- Select this option if you would like to synchronize Persons
Task
- Select this option if you would like to synchronize Tasks