How to use Synchronizer against multiple calendar systems
Overview
In this article, we describe how to use Synchronizer against multiple calendar systems.
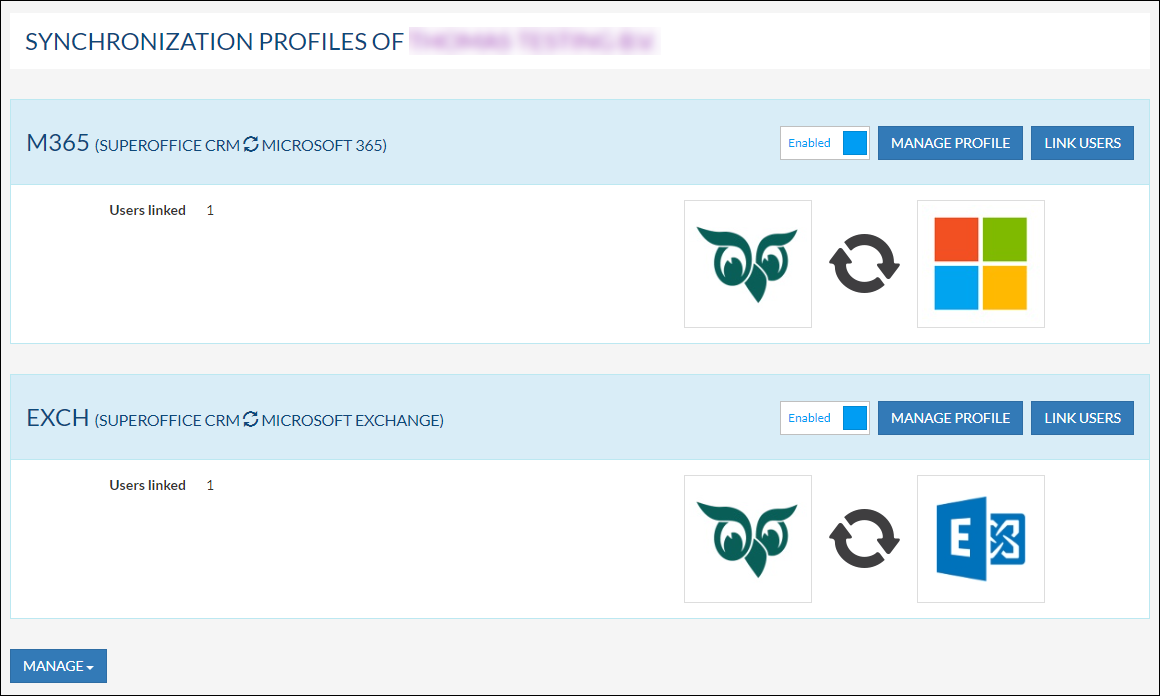
The idea is to create a profile per calendar system. For instance, one profile that connects to your SuperOffice database and to Exchange and another profile which connects to your SuperOffice database and Microsoft 365.
Intended Audience
This article is intended for persons who are administrators for Synchronizer.
Prerequisites
The following prerequisites are required before you follow the steps below.
- A (demo) subscription of Synchronizer. Subscriptions are handled by SuperOffice, please contact your SuperOffice contact or partner. To sign up, follow this URL: Synchronizer registration.
- A SuperOffice CRM login name with administrator rights.
- Multiple calendar systems, e.g: Exchange, and Microsoft 365.
Configure Synchronizer
- Log into Synchronizer as admin
- Create a profile that connects to your SuperOffice database and to, for example, Exchange.
- Click Manage > New Profile
- Create a second profile that connects to your SuperOffice database and to, for example, Microsoft 365.
- Click Manage > New Profile
Extending the idea
This How-to article describes how to use Synchronizer when you have more than one calendar system. The calendar systems we support are Exchange, Microsoft 365, and Google. More info.
This comes in very handy when you are in the middle of migrating your Exchange on-premise users to Microsoft 365. When you are migrating the users in smaller groups you can use this method to move smaller groups from one profile to the other.
Summary
You have learned to use multiple profiles in Synchronizer.