How to import Service Custom Tables
- Jan Verlaan (Unlicensed)
- Thomas Speekenbrink
Overview
DataBridge already has great support for all major SuperOffice entities like ‘Company’ and ‘Appointment’ for example, DataBridge imports these entities straight into the SuperOffice database to make the data available to your SuperOffice users.
Importing Service Custom Tables (or sometimes called Extra Tables) into SuperOffice raises a bigger challenge as the Tables are created via the Service Tables Modeler. Due to this complexity this feature has some restrictions to consider, so please read the checklist below carefully.
Please note: when we talk about Service Custom Tables we mean the Import of Service Custom Tables (or sometimes called Extra Tables). We do not cover user defined tables, sodictionary tables, cdd tables that are also not standard SuperOffice tables.
Checklist
Please consider the following requirements and restrictions that are currently effective for the SuperOffice Service Custom Tables import feature. As we continue development on this feature this list could change over time.
- SuperOffice 8.5 R1 with Netserver Services8.6 is the minimum requirement.
- Relation Columns (Foreign Keys) will not be filled automatically. You have to provide the Foreign Keys in a separate column manually e.g. when you want to link the data to a specific user or customer.
- Only Import of Service Custom Tables is available. Export is not (yet) possible.
How to
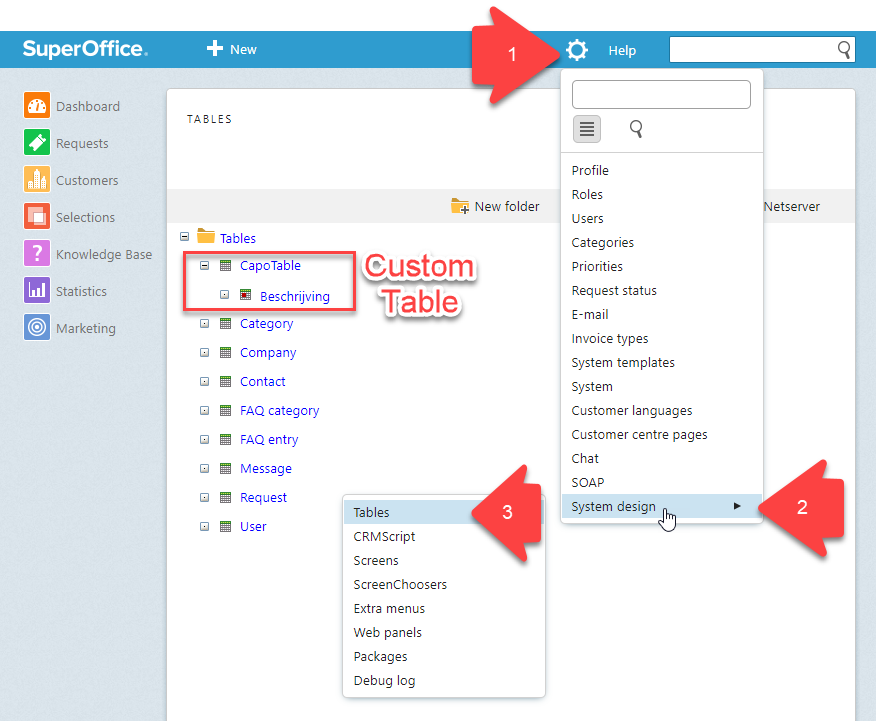
The Service Custom Tables needs to be available or created first in SuperOffice Service. Go to the Service page in SuperOffice and click in the menu-bar on the Maintenance wheel (1) > System design (2) > Tables
Check if the required table and table-fields are available.
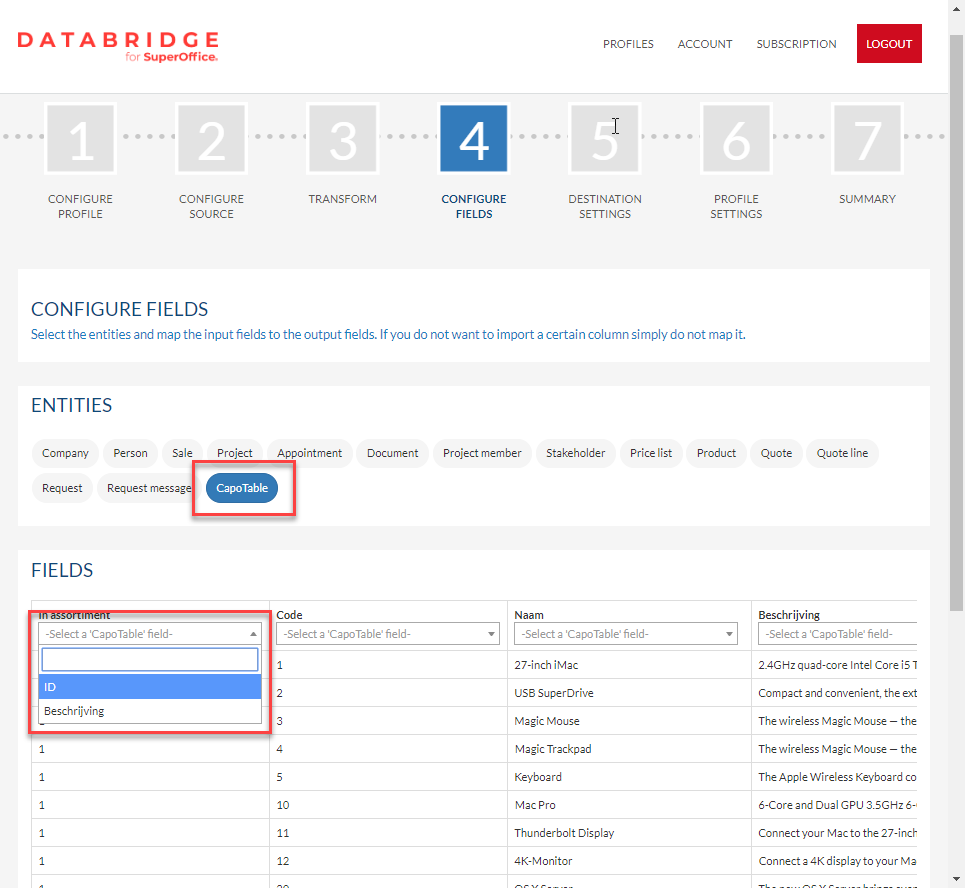
The custom tables are now available in DataBridge in an Import Profile in Step 4 - Configure fields. (When you have created new custom tables it could take maximum 5 minutes to have changes reflected in DataBridge)
When the Table is selected you use the drop-down functionality to choose the Table-fields for linking the data of the Import file chosen in Step 1 - Configure Profile.